| Home | About | Food | Fashion | Beauty | DIY | Shop |

Monday, October 31, 2011

Perfect Hard "Boiled" Eggs...

I really like hard boiled eggs, but I absolutely hate it when  you're trying to peel them and fail miserably... all of the whites sticking to the shell, and an ugly green ring around the middle. I've finally found the solution after literally years  of trial and error... You know I'm a super food-dork, because when I finally perfected my technique, I had to run around telling everyone I know. 
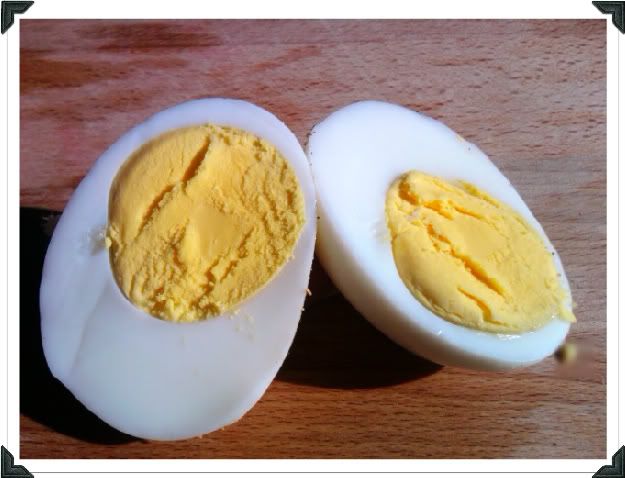
No whites missing. No icky green ring.

If you want easy peel hard boiled eggs there's a few super easy tricks
  • Don't use super fresh eggs. Make sure you buy the eggs and refrigerate them for at least 5 days prior to cooking them. As eggs age, they release a bit of gas that helps separate the papery skin, and thus makes the egg way easier to peel. 
  • Bring them to room temperature. Why does this help? I have no freaking clue, it just does.
    • Either set them on the counter for 20 min. or place them in a bowl of warm water for 5 min.
  •  And here's the super secret.... shhhhh.....
    • DON'T BOIL YOUR EGGS!!!!.... steam them.
      • Yup. That's it. The two previous tips help, but aren't always necessary. Steaming works every time.


Time: Approx. 20 min (doesn't include cool down time)

Method:

There are several types of steamers (bamboo, insert, built in, etc). I have a pot with an insert. Place 1-2 inches of water in the pot, then insert your steamer.
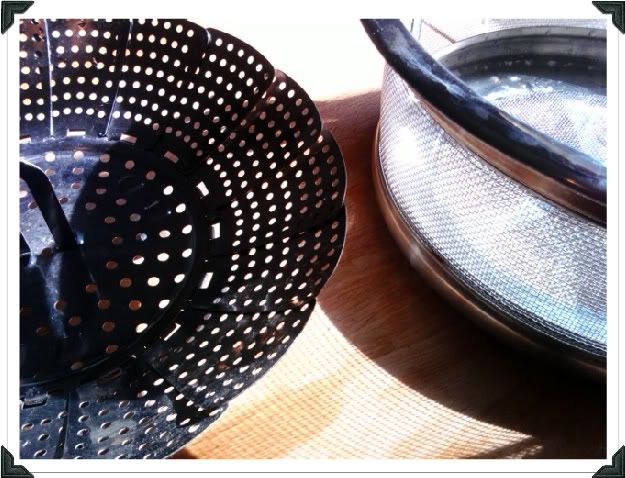
Left: Everyday Insert Steamer Right: Insert Steamer for All-Clad Stock Pot
Put room temperature eggs in steamer and securely cover.
Steam on low (or just a high enough heat to create steam... around a simmer) for approximately 20 min. for large eggs, and 22 min for extra-large. If you over cook them, this can lead to the icky green ring... but if you like your eggs soft boiled (which is super yummy for dipping toast) cut off a few minutes.
Remove from steamer and place in ice water for rapid cooling or leave on counter for about an hour before putting them in the refrigerator. They'll last in the fridge for about a week.
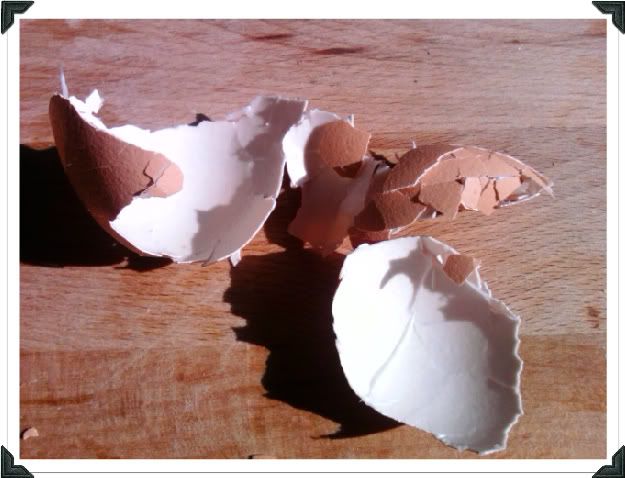
Nice large pieces of shell, no delicious whites attached.

If you can't wait, give them a tap on either end, roll on a hard surface, and be amazed by the easy peel!!! The peel should come off in a few large pieces, with no whites attached! Enjoy!


Monday, October 24, 2011

Chicken Soup


Classic chicken soup is a true comfort food. Yesterday (and unfortunately today) I woke up and saw my breath. Instead of freaking out and crying, which is my normal reaction, I decided I needed some comforting. Some serious comforting.
Soup's on.

Yield: aprrox 8 servings

Soup:
  • 2 Tablespoons vegetable oil
  • 2 medium onions, chopped
  • 3 medium carrots, cut into 1/4-inch rounds
  • 3 celery ribs, cut into 1/4-inch thick slices
  • 2 potatoes, cubed (about 1/2-inch)
  • 3/4 bag frozen peas... I LOVE PEAS! (I tend to add the whole bag, so it's more about how many you want floating around your soup bowl.)
  • 1/2 lb boneless skinless chicken breast, cubed (small enough to handle with your spoon)
  • 1/2 lb boneless skinless chicken thigh, cubed (same size as the boobies)
  • 2 quarts chicken stock or canned low-sodium stock (I happened to have had a chicken from the day before, so I made a stock. This is my personal favorite. In the end you need about 1/2 gallon.) 
    • I'd like to point out that I use stock, not broth. This is because the stock is made using the bones, so it has a richer flavor that I personally find more appealing, but either one works. The whole "low-sodium" thing is just because I like to be able to control the end saltiness myself.
  • 3 sprigs of fresh thyme or 1/2 teaspoon dried thyme
  • 2 bay leafs
  • Salt and freshly ground black pepper
  • Chopped fresh parsley, for garnish
  • Shredded parmesan, for garnish
Dumplings:
  • 2 C flour
  • pinch o' salt
  • 4 tsp baking powder
  • pinch o' pepper
  • 1 egg, beaten
  • 2 Tbsp butter, melted
  • 2/3 C milk


Preparation:


Heat the oil in a giant pot (I use a dutch oven) over medium heat. Add the onions, carrots, and celery and cook, stirring often, until the onions have just become translucent, about 10 minutes. Add the potatoes, stock, bay leaves, and thyme. Bring to a low simmer, covered and cook for about 30-35 min. 


Sift together the dumpling's dry ingredients. (I often add some thyme to the dumplings as well). Add egg, butter, and (slowly) enough milk to bring the batter together. It should be fairly thick (think oatmeal cookie dough). Let rest for 1 min.
Raise temperature until just below a boil. Add chicken, and peas. Spoon in dumpling dough/batter and securely cover the pot. Please, please, please, no peeking. Cook for another 15-20 min.
When your nose can't take it anymore (and your  whole house will smell like Grandma's making you a get well meal) plate up, or should I say "bowl up," a nice big serving. Sprinkle on that chopped parsley and bit of shredded parmesan. If you want an extra special kick to help clear out your stuffy nose, warm you up, or simply add a punch, I like a dash of cayenne per bowl... this will make you sniffle a bit, but it definitely helps warm you up.


(The perfect bowl of "grandma magic" can easily be made up to 3 days ahead, cooled, covered, and refrigerated, or frozen for up to 3 months.) 

Friday, October 21, 2011

Sick puppy

Hi all, 
Sorry I haven't posted anything this week. My poor silly dog loves food as much as I do and he swallowed a whole potato. This ended up with us rushing him into emergency surgery. All went extremely well, and he's sleeping off his "happy" pills. I'll be back with new recipes and fancy shoes soon. Promise. 

Sunday, October 16, 2011

How salt changed the world...

     Back in ancient Rome, soldiers were given a portion of salt everyday. They'd bring their salt ration to someone who would convert it into money. This would allow each soldier to buy his own salt, and have funds left over for life's other expenses. The money collected in exchange for salt was called "salt money." The Latin word for it was salarium. As time went on, the term traveled to medieval France. It became known as a soldier's solde. Today the term is still used for a soldier's or sailor's pay. A special coin called a sol was used specifically for this purpose. The word also ended up meaning not only to a soldier's wage, but also the actual soldier.  Around the late 13th century, the french word solde, adapted again. Salarie. Sound familiar? Yup...
     Somehow, in the late 15th century, all of these words (salarium, solde, salarie) became the word we all know and love today : salary. Also known as "money, money, money, monnnnnaaaaay!!!" (Sorry, I breakout into random song a little too often.)


Did you know?
     Tons of people have heard that salt was once insanely expensive. Not true. It only became relatively spendy near the end of the 12th century because it was used as a type of taxation. As a result, many people went without salt. This created a bit of a division in "salt classes." If you had lots o' salt, it just meant that you could afford your taxes, and then some.


Thursday, October 13, 2011

Molto Mare Parpadelle

I love summer. I love seafood. Put those together, and this dish is what you get. I feel especially privileged to have grown up around some seriously amazing seafood. My childhood began on a beautiful boat in the San Francisco Bay Area. There is some truly amazing dungeness crab, snapper and abalone in that area. Now? I'm living it up in New England... I've gotta say. I love the coasts. There's always new and exciting fresh local ingredients. I made this dish to celebrate a summertime spent on the seashore. Enjoy!


Wednesday, October 12, 2011

Let's talk...

  I decided to start this as a tribute to my love of everything delectable... that and everything sparkly.