 |
| Because it's the holidays, I amped these up a tad by dipping them in chocolate, sprinkling with candy cane, and making them into adorable little lollipops. |

Tuesday, December 20, 2011
Marshmallows! Need I say more?
Marshmallows are those lovely, soft, pillowy delights that everyone remembers roasting over a campfire, devouring stale at Easter, and watching melt away in your hot coco. Although they're ridiculously messy, they're quite easy to make, as long as you prepare yourself.
Labels:
candy,
candy cane,
chocolate,
dessert,
food,
holiday,
hot chocolate,
hot cocoa,
marshmallows,
peppermint,
smores,
Sugar

 No comments:
Sunday, December 18, 2011
Wakey, wakey... Eggs cupcake-y!
Well, not really cupcakes, but frittatas...made in cupcake pans! These are the perfect crowd pleasers. They also make an awesome grab-n-go breakfast.
These cute little bites are easy and super customizable. Everyone can have exactly what they eat, and no extra dishes. I hate dishes...
Anyways. Cut up whatever fillings you want. Cheese? Broccoli? Bacon? This is the time to let you inner creativity shine.
Preheat your oven to 350.
Next, lightly oil your muffin tins. Whisk up 6 eggs, a splash of milk (about an ounce), and some salt and pepper. Seriously whisk these. I'm talking super fluffy.
Sprinkle your toppings of choice in each muffin tin, then fill about 3/4 of the way up with eggs. Pop these cuties in the oven for 12-15 min. When they are slightly golden and have no shiny wet eggs left, take them out and let them cool in the tins for a few minutes.
Need some filling inspiration?
... Tell be about your creation!
• feta, spinach, tomato
• ham and swiss
• sweet potato, cheddar, broccoli
These cute little bites are easy and super customizable. Everyone can have exactly what they eat, and no extra dishes. I hate dishes...
Anyways. Cut up whatever fillings you want. Cheese? Broccoli? Bacon? This is the time to let you inner creativity shine.
Preheat your oven to 350.
Next, lightly oil your muffin tins. Whisk up 6 eggs, a splash of milk (about an ounce), and some salt and pepper. Seriously whisk these. I'm talking super fluffy.
Sprinkle your toppings of choice in each muffin tin, then fill about 3/4 of the way up with eggs. Pop these cuties in the oven for 12-15 min. When they are slightly golden and have no shiny wet eggs left, take them out and let them cool in the tins for a few minutes.
 |
| These ones I whipped really really really well, then added some potatoes and onion...mmm... |
... Tell be about your creation!
• feta, spinach, tomato
• ham and swiss
• sweet potato, cheddar, broccoli
Wednesday, December 14, 2011
Black bean soup
This is one of those great dishes you prep then forget. I like to soak overnight, then let it simmer away, perfuming my house with deliciousness, all day long.
Yield: 6-8 big bowls
Time: about 3 hours (not including bean soaking time... The longer it bubbles away, the more deliciously tender the beans become)
 Ingredients:
• 1 med yellow onion, diced
• 1 carrot, diced
• 1 bag dried black breans, soaked overnight and rinsed/water changed several times
• 2 bay leaves
• 3 Tbs cumin, divided
• 1 Tbs paprika
• 2 tsp pepper flakes (I have really yummy jalapeño fakes!)
• 1 tsp (heaping) pepper flakes {I have smoked ones that are great in bean dishes}
• 1 tsp thyme
• 1 1/2 qts chicken stock
• a few Tbs oil
Sweat carrots and onion until just tender. Sprinkle paprika, pepper flakes, and about 1/2 of the cumin. Add (drained and rinsed) beans, stock, bay leaves, and thyme. Stir and bring to a boil. Reduce to a slow simmer and cover loosely wit a lid. Stir every now and then.
3(ish) hours later...
Taste test time! Adjust salt and pepper, along with other spices. Always salt at the end; salt tends to intensify during the cooking process.
Once you have it just how you like it, soup's on! Add a dollop of sour cream, a sprinkle of cilantro... ta-da!
Tuesday, December 13, 2011
Udon at home... Quick and easy
I have a slight obsession with all things noodles. When I was a kid my dad dubbed me a "pasta-tarian" due to my abnormal love.
When it comes to Japanese cuisine, udon is where it's at. Those giant pillow noodles designed specifically for slurping are absolutely perfect. If I'm checking out a new Japanese place, this is the dish I base my entire opinion of the establishment on. I looooove udon noodles.
Every time I went to an Asian market, I'd fill my basked with shrink wrapped joy. And imagine my absolute glee when I discovered my regular supermarket had begun carrying my favorite brand! Needless to say, they have officially found a permanent home in my pantry.

Yield: 4 ginormous bowls
Time: about 20 min
For the udon:
• 5-6 C water
• 2 pkgs udon noodles (throw away the flavoring packs... It's so easy to make your own broth)
• 2 pkgs instant miso soup (my favorite is Trader Jose's)
• 4 C shredded kale or other green... Savoy cabbage is great
• 1 carrot, thinly cut on a bias
• 1/2 large yellow onion, roughly chopped
• 1 soft boiled egg per person (about 3-4 total)
• vegetable oil for sautéing
For the scallops:
• 10 large scallops (approx. 1#)
• 2 Tbs soy sauce
• 1 tsp rice wine vinegar
• 1 Tbs vegetable oil
Remove scallops from the fridge and put them in a mixing bowl. Combine soy, vinegar, and oil over the scallops and gently stir to coat. Set aside. (Leave them out to allow them to come to room temperature so they won't over cook... Kinda like a steak.)
Heat large pot over med-high. Add oil and onions. Sweat the onions for about 3 min. Add greens and carrots. Cover and wilt for about 7-10 min. You want the carrot to still have some crunch. Mush is no fun. Once the greens have wilted, add the water and miso powder. Bring to a boil.
Preheat a large cast iron skillet. When the oil begins to ripple, place the scallops in the pan. Do not over crowd them, as you want them to sear, not steam. Once placed, do not move them for at least 2 min.
Add udon noodles to boiling soup base. Stir, and cover.
Flip scallops over mad sear on other side until just cooked through. About 2-3 min. Remove from heat. The cooking time of the scallops really depends on how large they are. Most only take a few minutes per side. Also remember that they will be taking a hot bath in soup, and that will continue to cook them a bit.
To assemble the soup, place one soft boiled egg your bowl. Ladle soup over the egg to reheat it. Place 2-3 scallops on top.
Traditionally, poached eggs are served in udon, but i find it much easier to used soft boiled. You don't have to worry about timing or breaking the egg, etc.
Serve with Japanese pepper flakes... If you like it spicy.
I love breaking the egg so that the yolk can thicken the broth a little. This is definitely a dish where you can play with your food. Time to slurp and enjoy.
Friday, December 9, 2011
Christmas cookie cocktail

I wanted to try a new drink last night and came up with this while fiddling around the bar. It tastes like exactly what, well, the holidays! Mmmmmm...
Ingredients:
• 1 1/2 part Irish cream liqueur
• 1/4 part peppermint schnapps
• 1/2 part golden or dark rum
• 1 part heavy cream
• 2 parts cooled coffee
• crushed gingersnaps (to garnish)
• mini candy cane (to garnish)
Prepare your glass with the crushed cookies ( I swirled some melted chocolate in the bottom of the glass too) and put it in the freezer to get nice and frosty.
Combine liquids in a mixer and shake vigorously with ice. The mixture will become slightly frothy, and extra icy... Mmmmm.
Strain into your favorite martini glass, ignore the calories until New Year's day (uh-huh, sure... like I'll actually end up at the gym) and enjoy!
Mistletoe Martini

Ingredients:
- 1 part melon liqueur
- 2 part gin or vodka
- Splash dry vermouth (optional)
This one is as basic as it gets. Shake, then strain. The fun parts are the garnishes. Lemon twists taste great, but during the holiday season, I like a pretty sugar rim. Try using colored sugars, maraschino cherries, cranberries, pomegranate seeds... anything to add a little pizazz.
Time to sit back, and sip.
Thursday, December 8, 2011
Window Cookies
This recipe is really fun, and it happens to be a 2-in-1. They're part cookie, part candy. They definitely require a little patience, as there are several steps, but if you want to look like the next Martha Stewart at your holiday cookie swap, this is a pretty sure bet.
Yield: approx. 3 dozen
For the cookie: (this is a basic sugar cookie recipe, but can be swapped out with any dough well suited for cut out cookies...or if you were invited to a party, let's say tomorrow, just use refrigerated sugar cookie dough.)


Yield: approx. 3 dozen
For the cookie: (this is a basic sugar cookie recipe, but can be swapped out with any dough well suited for cut out cookies...or if you were invited to a party, let's say tomorrow, just use refrigerated sugar cookie dough.)
- 3 C all-purpose flour
- 3/4 tsp baking powder
- pinch of salt
- Lemon zest (1 lemon)
- 1 C butter (preferably unsalted, but it won't ruin your cookies either way)
- 1 C white sugar
- 1 egg, slightly beaten
- 1 Tbs milk
- powdered sugar (... so much yummier than flour for rolling out the dough)
For the window:
- 1 large bag of hard candy, like J.R. or L.S.
Sift together the first 5 ingredients. Set those aside, and grab a second bowl. Cream together the butter and sugar until they become a nice pale yellow. Add the egg and milk. Once combined, lower your mixer speed and gradually add the dry ingredients in stages. Only beat until the mixture begins to pull away from the sides of the bowl. Divide the dough in two, wrap in wax paper or plastic wrap, and refrigerate for 2 hours.
While the dough is resting, separate the colors/flavors of your hard candies. Unwrap them and put each color into a plastic bag. Now, use a rolling pin to smash the daylights out of your candy. Wasn't that just a little too fun?
Anywho, preheat your oven to 350. Remove one portion of dough. Roll out on well dusted surface to about 1/4" thick. Using about a 2" cookie cutter, cut out shapes. Take a 1" cutter and cut a "window" in each of your cookies. Transfer onto a parchment lined cookie sheet and place in fridge for about 10 min. (This helps the cookies keep their shape when baking.)
Right before putting your cookies in the oven, sprinkle a little mound of the crushed candies in the "window". Bake for 8-10 min until edges are just golden. Remove from oven and let cool for about 2 min. Slide cookies, parchment and all onto a wire cooling rack and let cool completely.
Now, devour... or, if you have WAY more restraint than me, these make a really pretty (and edible) ornament. Just use a toothpick to poke a hole in the dough before baking, then use a pretty ribbon to create a loop.
Rainbow sprinkles... diy
 Basically, the holidays mean sugar, and lots of it... So, why not make it extra special. All if those fancy holiday cookies are perfectly dusted with the most beautiful colors, and festive drinks have festive rims.
 This is one of those crazy simple how-tos that will get your creative juices flowing and save you some serious cash.
I should to give it to the store bought options for convenience, but this will take you even less time than it would to drag on your winter gear, scrape the ice off the car and jaunty on over the the store. So, in short. This way rocks.
Tuesday, December 6, 2011
Brownie Cookies
I love cookies. I love brownies. I thought, why not double the fun and combine them? So... that's exactly what I did.

Monday, December 5, 2011
"citrus"-cello
One of my favorite drinks is limoncello over ice. It's an amazing lemony liqueur that will always remind me of the summer after high school when I went to Italy.
Loving to experiment, I decided to expand the citrus fruits used in the drink to all of my favorites. What I've created may well be my favorite drink ever. I've had it alone (and it really doesn't need anything but ice), as a mixer, and drizzled over cakes to keep them extra moist. I think I'm in love.
 Ingredients:
•1 lemon
•2 mandarin oranges (or clementines... The mandarins don't have pips)
•1 pink grapefruit
•750ml vodka
•1 C water
•1 C sugar
Ok, so, this is pretty simple, you just need time. This recipe takes about 3 days and a dew supplies. I like to keep old wine bottles for this project. (you'll need about two) They're pretty and you can just use a cork to seal them.
 First, zest all of your fruit and place in a really big jar. You can use a big pitcher too. Pour all of your vodka over the zest. Stir and cover. You can leave this on the counter, just avoid direct light.
Next, take your citrus and juice them. Set the juice in the fridge until day 3.
3 days later... Ok, now it's time to make a simple syrup. As the name implies, it's seriously simple. Take equal parts (1 cup each) sugar and water and put in a small pot over med heat. Once the sugar has dissolved, remove from heat and let cool completely.
Once the syrup has cooled, it's time to combine everything. Strain out the zest from the vodka. Stir in the juice and syrup.
Bottle you're delish beverage in your clean, empty wine bottles. It's best enjoyed cold, so keep her in the fridge and enjoy!
Loving to experiment, I decided to expand the citrus fruits used in the drink to all of my favorites. What I've created may well be my favorite drink ever. I've had it alone (and it really doesn't need anything but ice), as a mixer, and drizzled over cakes to keep them extra moist. I think I'm in love.
 Ingredients:
•1 lemon
•2 mandarin oranges (or clementines... The mandarins don't have pips)
•1 pink grapefruit
•750ml vodka
•1 C water
•1 C sugar
 First, zest all of your fruit and place in a really big jar. You can use a big pitcher too. Pour all of your vodka over the zest. Stir and cover. You can leave this on the counter, just avoid direct light.
 Next, take your citrus and juice them. Set the juice in the fridge until day 3.
3 days later... Ok, now it's time to make a simple syrup. As the name implies, it's seriously simple. Take equal parts (1 cup each) sugar and water and put in a small pot over med heat. Once the sugar has dissolved, remove from heat and let cool completely.
Once the syrup has cooled, it's time to combine everything. Strain out the zest from the vodka. Stir in the juice and syrup.
Bottle you're delish beverage in your clean, empty wine bottles. It's best enjoyed cold, so keep her in the fridge and enjoy!
The Aaglaia
Drink time! I like my cocktails. I specifically love gin based drinks and citrus. I made this twist on a classic gin drink after making some awesome homemade "citrus"-cello. It's super easy and super delish.
I named it "Agalia" after the Greek goddess of splendor, adornment and magnificence. Who can't use a little of that during the holidays.
Let me know what you think.
Ingredients:
• 1 part gin
• 1/2 part limoncello
• 2-3 parts tonic water
Stir the gin and cello together. Pour over ice into a rocks/Collins style glass. (mine were all dirty so I used a white wine glass) Top with tonic. The total amount of tonic is up to you and really depends on how much you love gin.
Garnish with pretty ice cubes or a lemon twist.
Sip & enjoy.
 |
| Cranberries and rosemary add a festive touch to the ice cubes. |
Wednesday, November 30, 2011
Popcorn... All gown up.

Wednesday, November 23, 2011
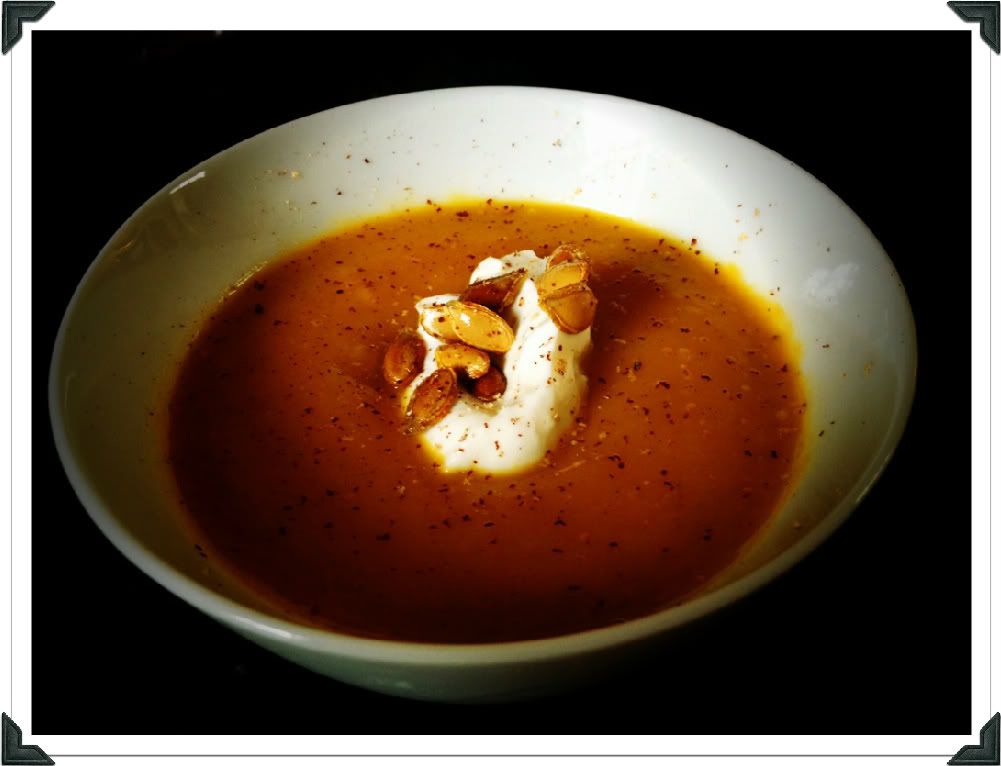
Butternut Squash Soup
This particular dish is one I will request on my deathbed. It's definitely one of my holiday must-haves. My mother's butternut soup will always be the best, but I can try.
Tuesday, November 22, 2011
Turkey Day Oops... Not A Problem
OK, so I was thinking about what is the absolute single must have ingredient in your kitchen over Thanksgiving. Or any major holiday meal for that matter... hell, why not just have it on hand all the time. You'll use it. I promise.
The ingredient? Stock. In this case, poultry stock. I always have chicken stock on hand. For Thanksgiving, you can use turkey stock if you want. It's totally up to you. Either way, no pantry is complete without it.
Now, you may be wondering why I'm slightly fanatical about this stuff. Well, that's because it will save your holiday meal. That and I use it in just about everything. (Here's my little secret: if I'm not using stock, then I'm using a bouillon cube of some sort... it just makes water soooooo much more interesting.) I guess that's not much of a secret.
Anywho, as I said, it can save your meal...
Potatoes too dry and you've used all the cream? Add some stock.
Gravy too thick? Add some stock.
Cooked that turkey just a wee bit too much? Dip it in some hot stock after carving. (This little trick adds flavor, moisture, and heats up that bird in a snap.)
Make your stuffing with stock and not water. As I said, way more interesting.
If your serving soup... make it with stock, not water.
See what I mean? It's not only in everything, but it can help fix those little blunders.
Hope this tip is helpful!
Have a ridiculously delicious Thursday!
The ingredient? Stock. In this case, poultry stock. I always have chicken stock on hand. For Thanksgiving, you can use turkey stock if you want. It's totally up to you. Either way, no pantry is complete without it.
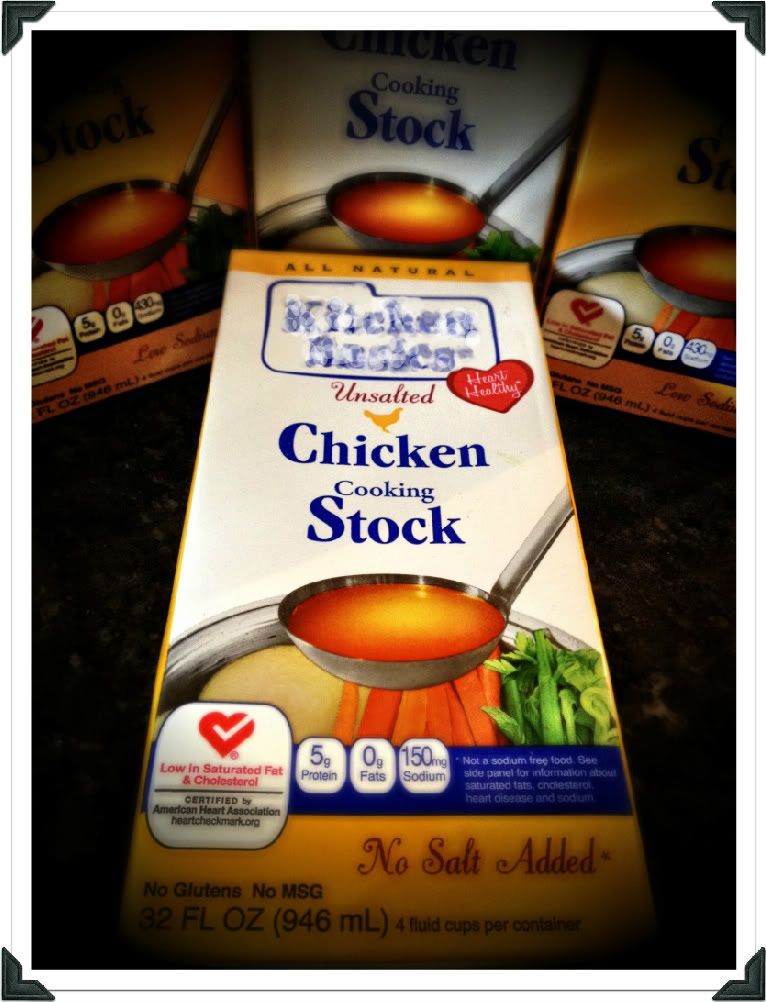 |
| I normally use a reduced salt variety only because I like being in control of the end result. |
Potatoes too dry and you've used all the cream? Add some stock.
Gravy too thick? Add some stock.
Cooked that turkey just a wee bit too much? Dip it in some hot stock after carving. (This little trick adds flavor, moisture, and heats up that bird in a snap.)
Make your stuffing with stock and not water. As I said, way more interesting.
If your serving soup... make it with stock, not water.
See what I mean? It's not only in everything, but it can help fix those little blunders.
Hope this tip is helpful!
Have a ridiculously delicious Thursday!
Wednesday, November 9, 2011
Andale, andale, AREPAS!
Ok, so I've officially discovered a new obsession. Best of all? My gluten free people (my mother and best girlie are both allergic) can eat as many as they want! YEY! Just as cool? It's a BLD ~ Breakfast Lunch Dinner. Yup, these little beauties can be consumed anytime, anywhere. Stuff them with a fried egg for breakfast, PB & J for lunch, and latin style chicken for dinner! See why I'm obsessed? I've finally discovered the perfect food.
Oh, and did I mention that a blindfolded two-year-old could make them? Yup, they're that easy.
Oh, and did I mention that a blindfolded two-year-old could make them? Yup, they're that easy.
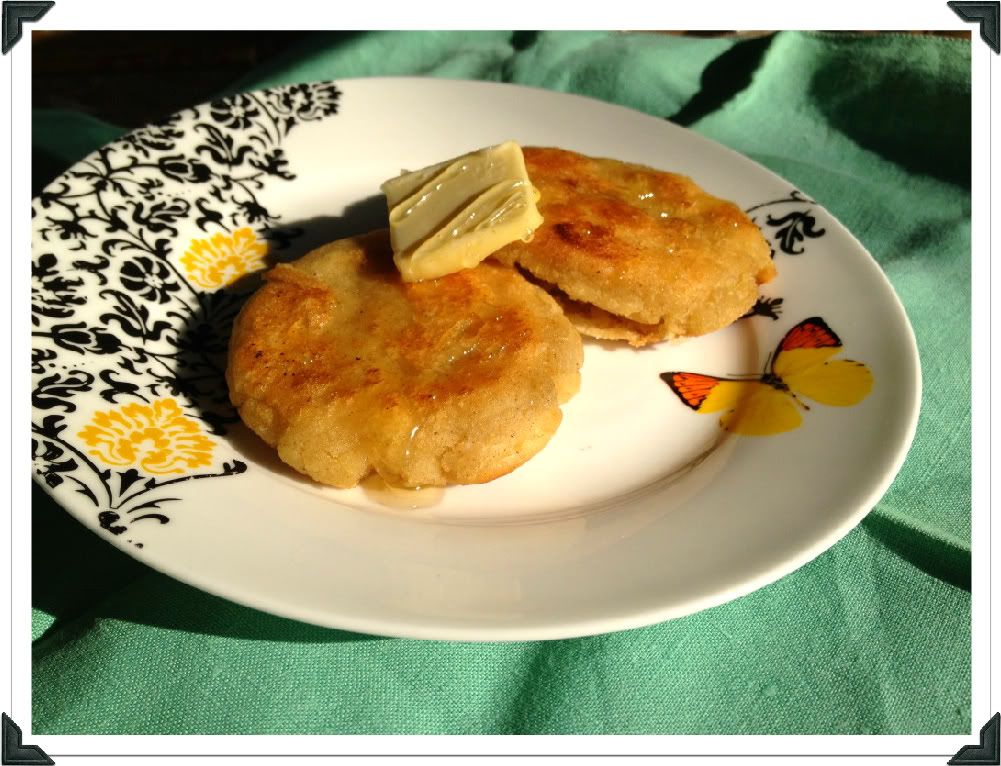 |
| Breakfast (honey and butter) |
Tuesday, November 8, 2011
Turkey Chili
Hi all! Ok, so this is one of my absolute FAVORITE fall meals. It's an adapted recipe of my grandmother's.
Yield: about 6 seriously healthy servings... more if you're piling on the toppings
Chili:
 Toppings:
Everyone likes to personalize there chili. If your serving this to a crowd of hungry fellas for Sunday's tailgate, make sure and have a few to choose from.
Okay, so start by sauteing the onions until lightly translucent in a big ol' pot. I use a glazed cast iron giant. Throw in the garlic, a few tablespoons of the spice mix, and the turkey.
Cook the turkey through, about 3 min. Deglaze (i.e. dump some liquid) with the beer. Stir around the pot to collect all of the yummy brown bits stuck to the bottom. When most of the liquid has evaporated, turn off the heat. Using a slotted spoon, remove the turkey to a dish and set aside. (It will be reincorporated at the end... no one likes tough meat.)
Turn the heat back up to med-high and add the tomatoes. Using the back of your slotted spoon (or a potato smusher) squish the tomatoes until there are only little bite-size pieces. Add beans, and a nice heap of the spice mixture (I end up using all of it by the end, but it really is up to your personal tastes. Start with a few tablespoons and work your way up.) Now cover everything with about an inch of chicken stock.
Once the mixture has come to a boil, stir and reduce to a simmer. Place lid loosely, so that steam can escape, and flavors can deepen. Cook for about 1 1/2 hours. Taste your creation. Add S&P to your liking.
Some of the liquid should have reduced, but if you like your chili a little thicker, take out that smusher again and pummel some of the beans. Not all of them, but give it a few good smashes so that some of the beans break open. Cook for an additional 15 min. The starches in the beans will help thicken everything up. Reincorporate the turkey. It's already cooked, so it just has to heat through.
If some unexpected guests show up, cook some elbow pasta on the side. You can stir in a few spoonfuls per bowl to bulk up the meal. (Keep it separate until serving, though, because the pasta will absorb all of the liquid and leave you with really mushy pasghetti.)
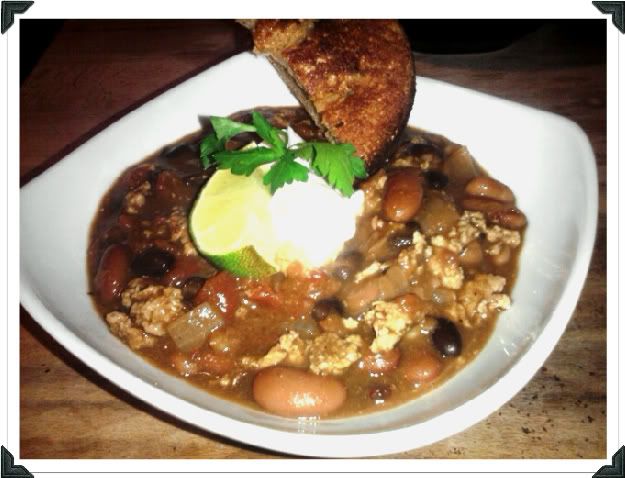
Time to dig in and enjoy the game, movie, book, blanket... whatever. It doesn't really matter what's going on when you have a nice warm bowl of chili.
Yield: about 6 seriously healthy servings... more if you're piling on the toppings
Chili:
- Gound turkey (dark meat is better for this)
- 1 huge yellow onion
- 2 cloves garlic
- 1 28oz can whole
- 2 T oil (for sauteing)
- 1/2 bottle IPA (the bitterness of this beer adds a nice balance)
- Tomatoes (I like to mash them myself for a nice texture)
- 1 can each kidney, black, pinto beans
- 2-4 C low-sodium chicken stock (low-sodium allows you to control the salt)
- lots of spice... I make my own mixture:
- 4 T cumin
- 2 T chili powder
- 1 T chili flakes (I have chipotle for a smokey flavor, or jalapeno for a south of the border flavor... depends on my mood. Lately I've been obsessing over the chipotle for chilies.)
- 2 tsp cinnamon
- 1/3 C cocoa powder (this wont sweeten at all, it just ads a really nice deep flavor... think mole sauce)
- 2 tsp coriander powder
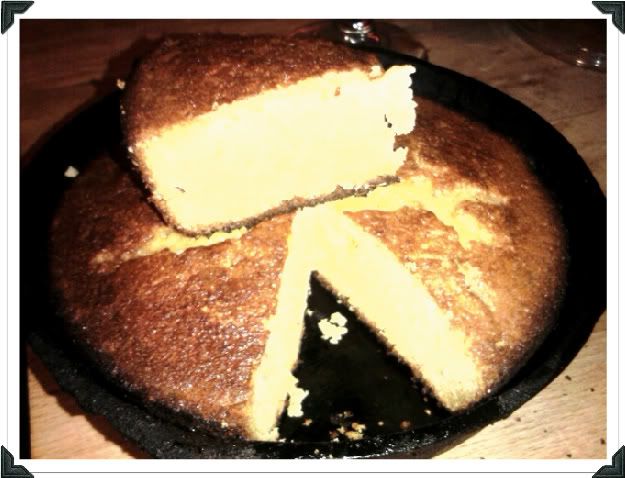
- Salt & Pepper to taste
- I'm lazy and use a mix... just follow the directions. I do, however, highly recommend baking in a cast iron pan. It imparts a great cowboy-esque feel. ]
Everyone likes to personalize there chili. If your serving this to a crowd of hungry fellas for Sunday's tailgate, make sure and have a few to choose from.
- Cheddar cheese (in my book, the sharper, the better.)
- Sour cream (I like low-fat. NEVER non-fat. To me, it has a nicer, smoother consistency.)
- Chopped onion, raw
- Cilantro... you can never have enough of this stuff! Mmmmmmm....
- Anything else your heart desires.
Okay, so start by sauteing the onions until lightly translucent in a big ol' pot. I use a glazed cast iron giant. Throw in the garlic, a few tablespoons of the spice mix, and the turkey.
Cook the turkey through, about 3 min. Deglaze (i.e. dump some liquid) with the beer. Stir around the pot to collect all of the yummy brown bits stuck to the bottom. When most of the liquid has evaporated, turn off the heat. Using a slotted spoon, remove the turkey to a dish and set aside. (It will be reincorporated at the end... no one likes tough meat.)
Turn the heat back up to med-high and add the tomatoes. Using the back of your slotted spoon (or a potato smusher) squish the tomatoes until there are only little bite-size pieces. Add beans, and a nice heap of the spice mixture (I end up using all of it by the end, but it really is up to your personal tastes. Start with a few tablespoons and work your way up.) Now cover everything with about an inch of chicken stock.
Once the mixture has come to a boil, stir and reduce to a simmer. Place lid loosely, so that steam can escape, and flavors can deepen. Cook for about 1 1/2 hours. Taste your creation. Add S&P to your liking.
Some of the liquid should have reduced, but if you like your chili a little thicker, take out that smusher again and pummel some of the beans. Not all of them, but give it a few good smashes so that some of the beans break open. Cook for an additional 15 min. The starches in the beans will help thicken everything up. Reincorporate the turkey. It's already cooked, so it just has to heat through.
If some unexpected guests show up, cook some elbow pasta on the side. You can stir in a few spoonfuls per bowl to bulk up the meal. (Keep it separate until serving, though, because the pasta will absorb all of the liquid and leave you with really mushy pasghetti.)
Time to dig in and enjoy the game, movie, book, blanket... whatever. It doesn't really matter what's going on when you have a nice warm bowl of chili.
Monday, October 31, 2011
Perfect Hard "Boiled" Eggs...
I really like hard boiled eggs, but I absolutely hate it when you're trying to peel them and fail miserably... all of the whites sticking to the shell, and an ugly green ring around the middle. I've finally found the solution after literally years of trial and error... You know I'm a super food-dork, because when I finally perfected my technique, I had to run around telling everyone I know.
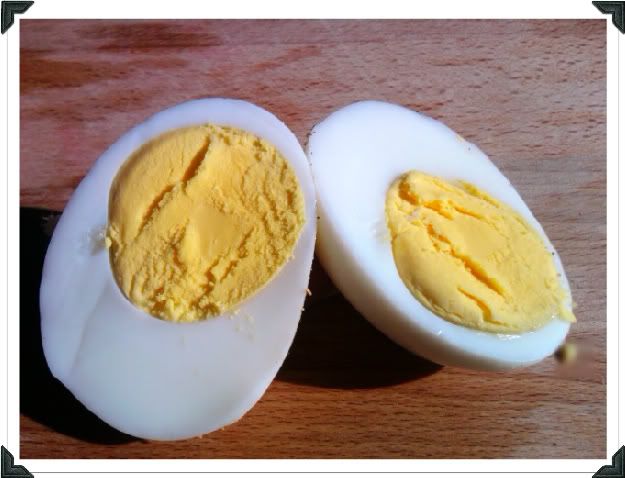 |
| No whites missing. No icky green ring. |
If you want easy peel hard boiled eggs there's a few super easy tricks:
- Don't use super fresh eggs. Make sure you buy the eggs and refrigerate them for at least 5 days prior to cooking them. As eggs age, they release a bit of gas that helps separate the papery skin, and thus makes the egg way easier to peel.
- Bring them to room temperature. Why does this help? I have no freaking clue, it just does.
- Either set them on the counter for 20 min. or place them in a bowl of warm water for 5 min.
- And here's the super secret.... shhhhh.....
- DON'T BOIL YOUR EGGS!!!!.... steam them.
- Yup. That's it. The two previous tips help, but aren't always necessary. Steaming works every time.
Time: Approx. 20 min (doesn't include cool down time)
Method:
There are several types of steamers (bamboo, insert, built in, etc). I have a pot with an insert. Place 1-2 inches of water in the pot, then insert your steamer.
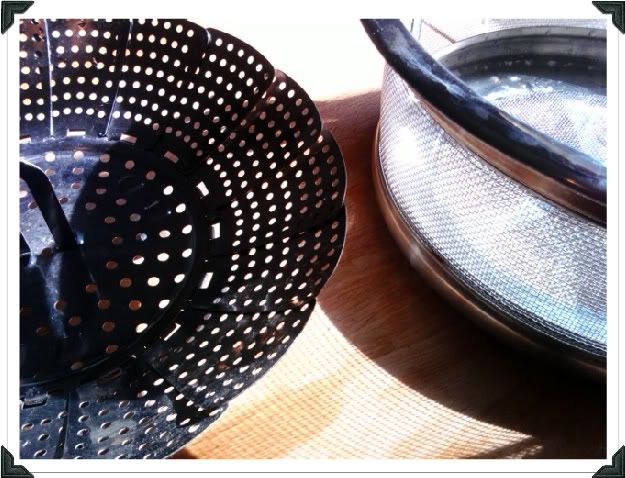 |
| Left: Everyday Insert Steamer Right: Insert Steamer for All-Clad Stock Pot |
Steam on low (or just a high enough heat to create steam... around a simmer) for approximately 20 min. for large eggs, and 22 min for extra-large. If you over cook them, this can lead to the icky green ring... but if you like your eggs soft boiled (which is super yummy for dipping toast) cut off a few minutes.
Remove from steamer and place in ice water for rapid cooling or leave on counter for about an hour before putting them in the refrigerator. They'll last in the fridge for about a week.
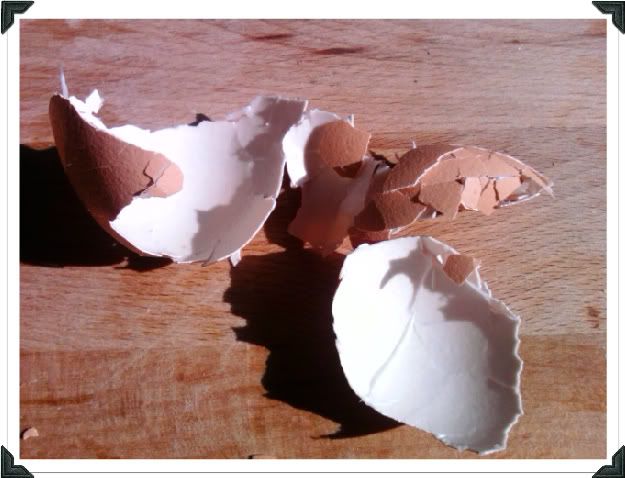 |
| Nice large pieces of shell, no delicious whites attached. |
If you can't wait, give them a tap on either end, roll on a hard surface, and be amazed by the easy peel!!! The peel should come off in a few large pieces, with no whites attached! Enjoy!
Monday, October 24, 2011
Chicken Soup
Classic chicken soup is a true comfort food. Yesterday (and unfortunately today) I woke up and saw my breath. Instead of freaking out and crying, which is my normal reaction, I decided I needed some comforting. Some serious comforting.
Soup's on.
Yield: aprrox 8 servings
Soup:
- 2 Tablespoons vegetable oil
- 2 medium onions, chopped
- 3 medium carrots, cut into 1/4-inch rounds
- 3 celery ribs, cut into 1/4-inch thick slices
- 2 potatoes, cubed (about 1/2-inch)
- 3/4 bag frozen peas... I LOVE PEAS! (I tend to add the whole bag, so it's more about how many you want floating around your soup bowl.)
- 1/2 lb boneless skinless chicken breast, cubed (small enough to handle with your spoon)
- 1/2 lb boneless skinless chicken thigh, cubed (same size as the boobies)
- 2 quarts chicken stock or canned low-sodium stock (I happened to have had a chicken from the day before, so I made a stock. This is my personal favorite. In the end you need about 1/2 gallon.)
- I'd like to point out that I use stock, not broth. This is because the stock is made using the bones, so it has a richer flavor that I personally find more appealing, but either one works. The whole "low-sodium" thing is just because I like to be able to control the end saltiness myself.
- 3 sprigs of fresh thyme or 1/2 teaspoon dried thyme
- 2 bay leafs
- Salt and freshly ground black pepper
- Chopped fresh parsley, for garnish
- Shredded parmesan, for garnish
Dumplings:
- 2 C flour
- pinch o' salt
- 4 tsp baking powder
- pinch o' pepper
- 1 egg, beaten
- 2 Tbsp butter, melted
- 2/3 C milk

Preparation:
Preparation:
Heat the oil in a giant pot (I use a dutch oven) over medium heat. Add the onions, carrots, and celery and cook, stirring often, until the onions have just become translucent, about 10 minutes. Add the potatoes, stock, bay leaves, and thyme. Bring to a low simmer, covered and cook for about 30-35 min.
Sift together the dumpling's dry ingredients. (I often add some thyme to the dumplings as well). Add egg, butter, and (slowly) enough milk to bring the batter together. It should be fairly thick (think oatmeal cookie dough). Let rest for 1 min.
Raise temperature until just below a boil. Add chicken, and peas. Spoon in dumpling dough/batter and securely cover the pot. Please, please, please, no peeking. Cook for another 15-20 min.
When your nose can't take it anymore (and your whole house will smell like Grandma's making you a get well meal) plate up, or should I say "bowl up," a nice big serving. Sprinkle on that chopped parsley and bit of shredded parmesan. If you want an extra special kick to help clear out your stuffy nose, warm you up, or simply add a punch, I like a dash of cayenne per bowl... this will make you sniffle a bit, but it definitely helps warm you up.
(The perfect bowl of "grandma magic" can easily be made up to 3 days ahead, cooled, covered, and refrigerated, or frozen for up to 3 months.)
Friday, October 21, 2011
Sick puppy
Hi all,
Sorry I haven't posted anything this week. My poor silly dog loves food as much as I do and he swallowed a whole potato. This ended up with us rushing him into emergency surgery. All went extremely well, and he's sleeping off his "happy" pills. I'll be back with new recipes and fancy shoes soon. Promise.

Sorry I haven't posted anything this week. My poor silly dog loves food as much as I do and he swallowed a whole potato. This ended up with us rushing him into emergency surgery. All went extremely well, and he's sleeping off his "happy" pills. I'll be back with new recipes and fancy shoes soon. Promise.
Sunday, October 16, 2011
How salt changed the world...
Back in ancient Rome, soldiers were given a portion of salt everyday. They'd bring their salt ration to someone who would convert it into money. This would allow each soldier to buy his own salt, and have funds left over for life's other expenses. The money collected in exchange for salt was called "salt money." The Latin word for it was salarium. As time went on, the term traveled to medieval France. It became known as a soldier's solde. Today the term is still used for a soldier's or sailor's pay. A special coin called a sol was used specifically for this purpose. The word also ended up meaning not only to a soldier's wage, but also the actual soldier. Around the late 13th century, the french word solde, adapted again. Salarie. Sound familiar? Yup...
Somehow, in the late 15th century, all of these words (salarium, solde, salarie) became the word we all know and love today : salary. Also known as "money, money, money, monnnnnaaaaay!!!" (Sorry, I breakout into random song a little too often.)
Somehow, in the late 15th century, all of these words (salarium, solde, salarie) became the word we all know and love today : salary. Also known as "money, money, money, monnnnnaaaaay!!!" (Sorry, I breakout into random song a little too often.)
Did you know?
Tons of people have heard that salt was once insanely expensive. Not true. It only became relatively spendy near the end of the 12th century because it was used as a type of taxation. As a result, many people went without salt. This created a bit of a division in "salt classes." If you had lots o' salt, it just meant that you could afford your taxes, and then some.
Thursday, October 13, 2011
Molto Mare Parpadelle
I love summer. I love seafood. Put those together, and this dish is what you get. I feel especially privileged to have grown up around some seriously amazing seafood. My childhood began on a beautiful boat in the San Francisco Bay Area. There is some truly amazing dungeness crab, snapper and abalone in that area. Now? I'm living it up in New England... I've gotta say. I love the coasts. There's always new and exciting fresh local ingredients. I made this dish to celebrate a summertime spent on the seashore. Enjoy!


Wednesday, October 12, 2011
Let's talk...
 I decided to start this as a tribute to my love of everything delectable... that and everything sparkly.
Subscribe to:
Posts (Atom)